So I stopped by the PB office to drop off a big check (2nd installment due when shell complete) and pick up the tile sample that came in - the
MasterTile Desert Canyon Rainbow Green (I hope this link works, but their website is not very friendly.) It's very pastel with less green than I imagined (and hoped). Since I was there, I took a few minutes to browse around the samples and start looking for the two tiles I liked from yesterday, just to see the variation. Couldn't find the
Bicio Papao Blue, except a single tile on a giant board from another company, and that sample has a weird green streak in it. So the office guy, Drew, called the designer to find the Luv Tile sample, but it was never there, of course, because I had forgotten about last week, when I had nixed that series tile based on the other colors because of the plain, flat ones.
It turns out that Erin was 5 minutes away on her way to the office, so I waited and we started talking tile choices again, and she told me that after thinking about it, she really likes the
Luv Earthview Blue for our pool, too. She pulled out those same glass tile sheets for step markers and the swim lane, but I'm still not crazy about them (See "Scraping" post for the first look at these). I'm pretty sure I want something more iridescent, and these tiles only have little bronze streaks in just a few of the dark gray and white pieces.
Bottom line is that I've just got to see what it looks like underwater with the pebble color, which I'm leaning toward
PebbleTec Blue Lagoon. So she makes a phone call and we're off! (Note: I was leaning this way because of
this posting on the
GardenWeb Pools & Spas forum that pictured a perfect pool.)
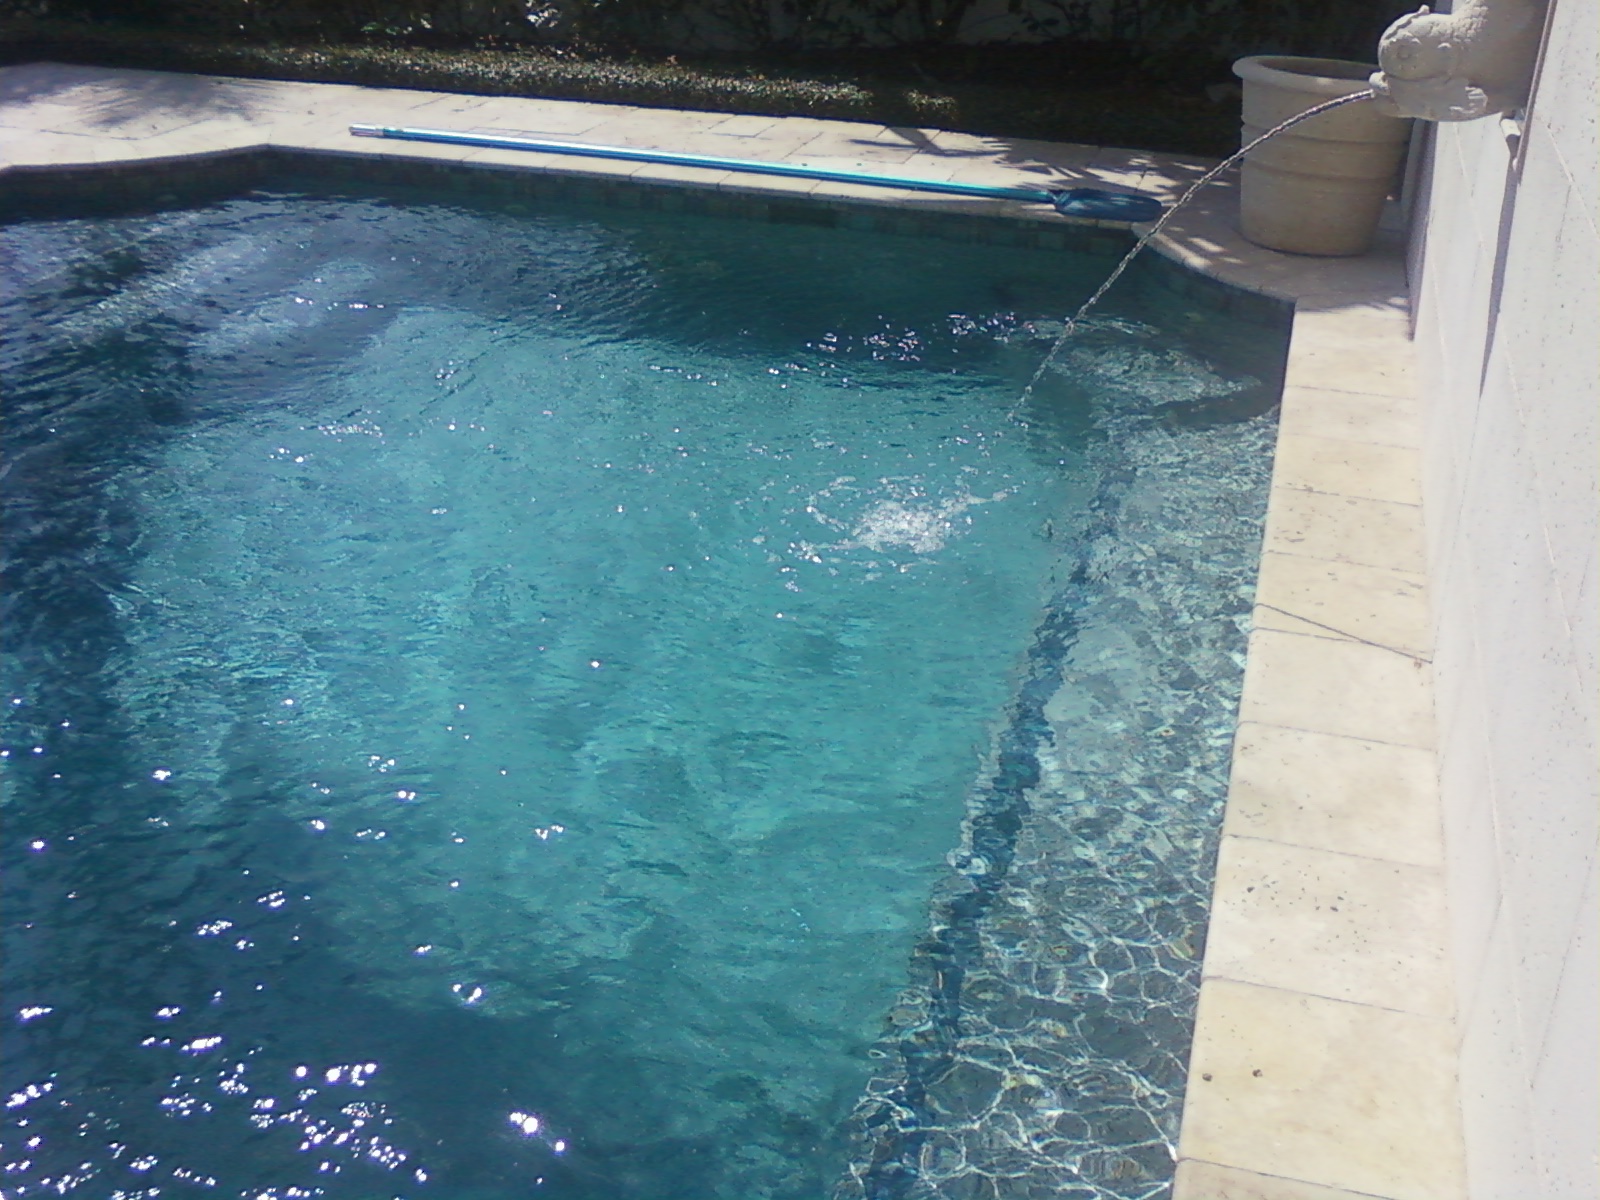
I thought I was decided on Blue Lagoon, but wanted to see the "Shimmering Sea" abalone shell additive, but when we got to the pool, well, it just wasn't all that blue, in my opinion. Uh oh. This isn't what I was hoping for at all. I still detect a hint of green, and I don't think it's being influenced by the large tiled sunshelf. The abalone sparkles are barely visible and certainly not noticeable with the water rippling (windy day plus fountain plus wall squirters going). And scraping my foot on a step, the PebbleTec seemed rougher than I remembered (it has bigger stones in it) but it definitely has that pebbly look that the hubby likes. Hmmm. Not all that excited about it, but we take pictures of the various tiles up against the water (and some submerged in the water) just to see what they all look like.
As we drove back to the office, I talked to Erin about our original PebbleTec Blue Lagoon vs.
PebbleSheen Aqua Blue dilemma, and she realized that she did another pool nearby using PebbleSheen Aqua Blue with the Shimmering Sea, so a few phone calls later, we were on our way. One look at the pool, and
that's BLUE. Gorgeous. It's perfect - love it.
I know pictures are tough because of lighting and camera and monitors and just too many factors to truly compare. Since I hadn't planned this trip at all, I only had my cell phone camera handy. But these pictures were taken within 30 minutes of each other and at approximately the same angle off the late morning sun. The designer was just happy because I had an immediate positive reaction to the color.
Erin held up the various tiles that we had brought along to see how they would look against the water, and they all looked pretty good to me. The coping on this pool was a similar neutral to the Shellock Tan coping that we'll be using. Unfortunately, the position of the sun put almost all the waterline tile in shadow under the coping, except for the sunshelf end, where the pool color is much lighter, of course.
I realize that these camera-phone pictures are pretty bad (perhaps I should've wiped off the lens?), but you get the idea. The first tile pictured is the MasterTile Desert Canyon series Rainbow Green tile, which looks very neutral because of the pastel coloring. The second tile is the Luv Tile Earthview Green, which is my top pick at the moment.
Since the Bicio Papao was on a giant sample board, we couldn't exactly dunk it, so that picture shows the tile
near the water. (Keep in mind that the waterline tile will be 1/2 submerged all the time.) It's the blue one in the middle of the bottom row - you can just see that weird green vertical streak in the middle of it (if you look at the samples in the previous post, none have anything like this). These shallow-end & step pictures are showing up greener on my monitor than reality - I'm blaming the camera-phone for the distortion.

But I took a close up near the first step anyway, for the current top pick Earthview Blue, and I think I really like the deeper blue. I like that the brown-gold accents aren't really streaky because streaky tiles seem to end up looking like mis-matched stripes when they're stacked on the spa. BTW, that's one of the deciding factors in this, because the waterline tile is only 6" high around most of the pool, it will be stacked higher around the spa, and the patterned tiles end up looking like stripes when they are stacked. It'd be nice if some of the patterned tile collections had matching solids, but most don't, so if there's a spa involved, you'll end up with stripes.
It looks like this pool is using the
MasterTile Rocky Stream series Light Blue in 3"x3" format (which I was warned against). So I can tell that the water is about 1/2" low. This is one of the series that I liked, and came in a pretty mosaic pattern with "solid" matching tiles in 3x3 or 6x6 formats, but I personally didn't want the mossy green that was in it.
On a side note, the chunk of granite that they found for the spillover is gorgeous. In the picture, it looks like a reflection from the sun, but that bright blue spot is a beautiful opalescent streak in the rock, and there are smaller streaks that didn't show from this angle. It's truly magnificent, and I don't even like granite, normally.
Next test is for the step markers and swim lane line. We had brought along a strip of the grayish glass tile (that I didn't particularly care for) and a sample of the new
PebbleTec Finishing Touches Geometric Sky Tile to see how it looked underwater. Keep in mind that the swim lane is going to be as deep as 6 1/2' under, although I'll mostly be looking at it underwater with goggles on, not from above the surface of the water.
But we lay both samples on the first step to see how they look. In my pool, this is how it would look on the tiny sunshelf on the entry steps, and the two small steps on either side of the spa. And then we lay the tiles on the second step to see how that looks, keeping in mind that "2nd step" is also equivalent to the bench, the main swimout, the spa bench and the two spa swimouts.
Reaching down to the third step is up to my shoulder, so I got my shirtsleeve wet getting these in. We are now thinking about what happens when the glue holding the tiles onto the mesh starts to give out. And one of the Sky tiles does fall off and I almost have to dip my shoulder in to get it out. But my swim line is even deeper and I tossed the no-name strip in, hoping it might land right-side up (not sure if it did).
The gray and white tiles are gone, looking down from above the surface of the rippling water. Hmmm. Look right in the middle of that picture, and you can just make out a couple of royal-bluish spots. That's the tile strip. Not thrilled, but the price is right. (Turns out they have boxes of this stuff in their storage room left over from another project, so they will unload it at a very reasonable price, wink wink.) Good thing the net is handy so we can scoop the tile strip out. I
think we got all of them.
No more pictures until I get a real camera. Check back tomorrow for the rest of the Friday adventure.